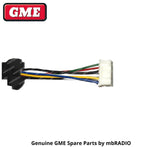
GME MIC CURLY CORD SUIT MC616 / MC616W MARINE MICROPHOINE
115616Suits: MC616B MC616W MARINE MICROPHONE
Silicon sealant included to keep the IP67 rating.
Fitting Instructions
TIP: Take some pics with your phone before you start and as you go.
- Unscrew the 6 screws on the rear of your microphone.
- Gently open up the MIC and be careful not to damage the delicate silicon gasket that seals the front and back shell together.
- Unscrew the 4 screws holding the PCB to the MIC back shell.
- Carefully remove the PCB.
- Remove the old curly cord by unplugging the white connector on the PCB and remove it from where it enters the MIC shell.
- Clean out the silicon sealant as best you can where the cord enters the MIC.
- Fit the new curly cord to the PCB, re-mount it and fit the 4 screws back in place.
- Put a small amount of silicon sealant in the groove area where you cleaned out the old silicon from where the curly cord entered the MIC.
- Before fitting the new MIC curly cord in, you will notice one side has a tab on it, make sure this goes in the correct way - check the pic you took.
- Put some more silicon on the top part of the MIC curly cord where it goes into the shell. Its important that you make sure that there is plenty of silicon sealing this area otherwise your MIC will no longer be IP67 rated and may become damaged due to the salt water/air ingress over time. Do it right the first time 😊
- Carefully re-fit the silicon gasket making sure it is correctly fitted in the groove the surrounds the MIC shells so that both front and back will fit back together perfectly.
- Gently re-assemble the front and back together and press firmly so its snug.
- Before screwing in the back case screws, plug the MIC into your radio and make sure that it is transmitting and the TX/RX audio is fully functioning. Try and get a radio check or use a handheld to check this. If it isn't, you didnt plug the white connector in correctly.
- If it is all working as it should, re-fit the 6 screws on the back - careful not to over tighten and strip the thread.
 mc520c


